How to install PVC Panels pvc panels as the important material used
in building industry. how it is installed? we show you the correct
installation for your pvc panels for walls and ceilings. you may
find yourself an export in installing pvc panels after reading
through this s Installation Instructions What you have to remember:
Use the panel for indoor uses only. The background must be sound,
dry and in good condition. When using the panels in high pressure
shower areas, use silicon sealant in the groove on the back of the
lip for a water-tight seal. Before fitting panels around sources of
heat, for example radiators or fire places, make sure the
temperature level doesn't exceed allowed level of 140ºF (60ºC).
Decorative plastic panels are a decorative covering that offers
many benefits as they are waterproof, maintenance free, extremely
versatile and very easy to install. Our panels can be easily
applied to any surface. By fitting them yourself using our easy
guide, you won't have to hire costly professionals. All pvc
panels are tongue and groove and need only simple tools to fit and
attach them. Plastic panels can be stuck to any surface including
uneven surfaces, with little or no preparation required. Decorative
plastic also offer a range of finishing accessories such as edge
trims, internal and external corners, cornice trims and skirting
boards that ease the task of fitting and ensure a perfect finish,
whatever your room is shaped. Surface preparation In the
majority of the cases there is virtually no preparation needed -
the panels can go straight onto brick, cement block, plaster,
timber wall studs or stud-work and can even go over existing
ceramic tiles. Sometimes bathrooms are half-tiled. In that
case tiles can be left in place and the top half leveled out to the
same level. Before starting installation, make sure that the extra
thickness of the wall paneling does not interfere with the
operation of existing fixtures such as bath taps, shower mixer
valves and doors. If the surface is very uneven, wall studs can be
used to achieve a level surface and then the panels can be attached
to the wall studs. Position studs with 1 to 2 ft (30 to 60 cm)
intervals. The use of studs allows you to install cables for
switches, plugs for power supply, phones sockets etc. Pl.s note
that building codes might require that panels thinner than 1/4" be
installed over a non-combustible backer over timber studs. Such
panels should be installed over a solid, non-combustible backing
such as gypsum wallboard. Cutting the Panels Panels can be
easily cut or trimmed using a hand saw, table saw, portable
circular saw, jig saw or sharp utility knife. We recommend using a
fine-tooth saw. The finer the teeth, the neater the cut you will
achieve. Installation Panels are normally fixed vertically
i.e. from floor to ceiling; however panels may also be fitted
horizontally if the shape of the room makes this an easier option.
Similarly, ceiling panels can be run in either direction. Of
course, you may have a preference as to which way you would like
run the panels for visual effect. Fitting Instructions:
Decorative plastic panels are easily fixed to almost every surface.
Depending on the type of wall or ceiling you can choose different
types of fitting. Nailing: Apply nails evenly and level in
the panel lip. Be careful not to hit the panel with the hammer.This
method only applies when fixing the cladding to a wooden surface or
battening. Make sure the battening is flat and level, packing out
where necessary on uneven walls so that when applied the cladding
does not develop curvature and follow the walls contours. In cases
of damp and uneven walls we recommend the use of treated timbers
for battening. Ensure that you leave sufficient ventilation behind
the cladding by providing air gap. Screw fix: Apply screws
through the panel lip as shown in the diagrams below. Screw fixing
can be made to wooden wall studs. However breezeblock, brick or
plasterboard will require the wall to be plugged before screwing.
When the first plank is fixed in place the next conceals the
previous fixing see diagram below. Stapling: You can use
stainless steel staples when fixing to plaster or wooden wall studs
- this method is particularly suitable when using wall studs.
Always make sure your wall studs are flat and level, packing them
out where necessary on uneven walls, this will prevent the panels
from developing a curvature following the wall contours.
Gluing: This is the method most preferred by many installers
however you can only use adhesive when applied to a dry, even wall.
The wall must be free of any greasy substances and dust.Only use
specialist adhesive. Below is one of the methods aimed to minimize
the use of trims and achieve very neat and professional look and
feel: Start working from one corner. If cornice will not be
used to cover the top edge of the panel, then first fix start/end
trim or cornice trim at the top along
Quality Home Decor Interior Decorating Wooden Grain PVC Panel Decoracion Pared products, provide good price Home Decor Interior Decorating Wooden Grain PVC Panel Decoracion Pared from .
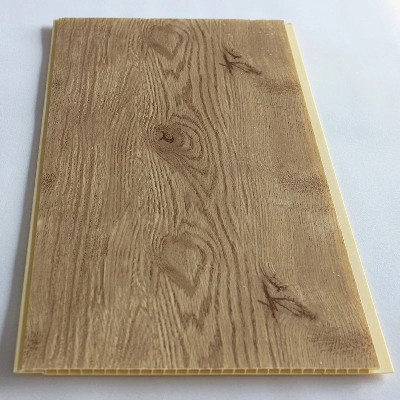
Larger photo of Home Decor Interior Decorating Wooden Grain PVC Panel Decoracion Pared
Related products about Home Decor Interior Decorating Wooden Grain PVC Panel Decoracion Pared
-
 Waste Tyre Plastic Recycling Machinery Machine Tire Crusher Production Line Rubber Crumb Grinding Machine Equipment Tire Shredder
-
 Stretch Plastic Blowing Pet Bottle Making Blow Molding Machine Bottles Stretch Automatic Pet Bottle Blowing Machine
-
 Waste Plastic Pet Bottle, Water Bottle Flake, PP/HDPE/LDPE PE Film Jumbo Woven Bags Plastic Crusher Machine, Plastic Crushing Washing Recycling Machine
-
 Type 2 Wall-Mounted Electric Car Charging Station 7kw /11 Kwelectric Vehicle Charging Station Home Wallbox AC EV Charger Single Phase or 3three Phase
-
 G-View G12W Wholesale Auto Car LED Headlight Bulb High Power H13 H11 9005 H7 H4 Car LED Headlights LED Car Lights
-
 New Design Porcelain Round Plates Dinner Set for Wedding and Banquet
-
 China 2023 New Design Super Soft 100% Polyester Microfiber Knitted Oversized Decoration Hoodie Blanket
-
 Handmade Art Creative Materials Thickened White Paper Cup DIY Disposable Handmade Colored Paper Cup


